Diall Digital Immersion Timer Wiring Instructions
In today’s fast-paced world, convenience is a necessity. And one area where convenience can make a significant difference is in managing our home’s hot water supply. Diall Digital Immersion Timers provide an efficient solution for controlling your immersion heater, ensuring you have hot water when you need it. To make the most of this modern technology, it’s essential to understand how to wire and program your Diall Digital Immersion Timer correctly. In this comprehensive guide, we’ll walk you through the step-by-step process of wiring and programming your Dial Digital Immersion Timer for optimal performance.
1. Introduction
Diall Digital Immersion Timers are designed to give you control over your hot water supply. Whether you want to ensure hot water is ready for your morning shower or save energy by heating water only when needed, these timers are a valuable addition to your home.
Diall digital immersion timers are typically used to control the heating element in a hot water cylinder or tank. To wire a Diall digital immersion timer, follow these general instructions. Please note that these instructions are for reference, and you should always consult the specific user manual that came with your timer for accurate details.
Diall Digital Immersion Timer Wiring Guide
In this comprehensive guide, we’ll walk you through the detailed steps for wiring a Diall Digital Immersion Timer. Whether you’re a seasoned DIY enthusiast or a homeowner looking to save on energy costs, understanding the wiring process for this timer is essential. Our expert guidance will help you complete the installation smoothly and efficiently.
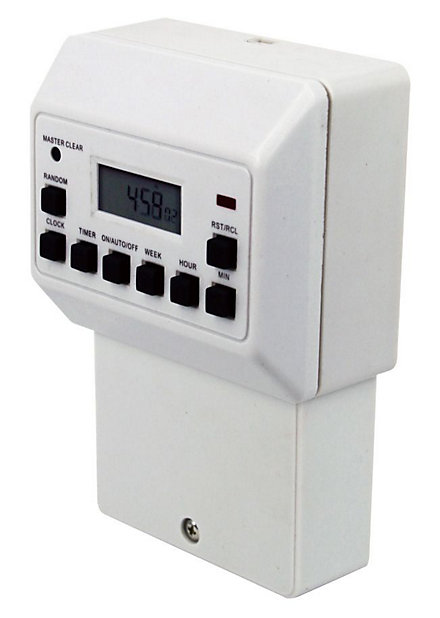
The Diall Digital Immersion Timer is a cutting-edge device designed to automate the operation of your immersion heater. It allows you to schedule when your immersion heater turns on and off, optimizing energy usage and providing hot water precisely when you need it. To ensure you get the most out of this device, let’s dive into the wiring process.
Tools and Materials
Before you begin, gather the necessary tools and materials:
- Diall Digital Immersion Timer
- Screwdriver
- Wire strippers
- Electrical tape
- Wire connectors
- Electrical junction box
- Cable clamps
Safety First
Safety is paramount when working with electrical systems. Always turn off the power at the main circuit breaker and use a voltage tester to ensure that the circuit is de-energized before starting any work.
Wiring Steps
Step 1: Mounting the Timer
Begin by selecting a suitable location for your Diall Digital Immersion Timer. It should be easily accessible and close to your immersion heater. Use the provided screws to securely attach the timer to the wall.
Step 2: Preparing the Wiring
Next, identify the wires from your immersion heater. You will typically find three wires:
- Live (L)
- Neutral (N)
- Earth (E)

Step 3: Connecting the Wires
- Connect the Live (L) wire from your immersion heater to the “L” terminal on the timer. Use a wire connector to secure the connection.
- Connect the Neutral (N) wire from your immersion heater to the “N” terminal on the timer, again using a wire connector.
- Connect the Earth (E) wire from your immersion heater to the “E” terminal on the timer.
- If your immersion heater has a switched live wire, connect it to the “SL” terminal on the timer.
Step 4: Mounting the Junction Box
To ensure a neat and safe installation, mount the electrical junction box nearby. This will protect the timer’s wiring connections and provide easy access for any future maintenance.
Step 5: Testing
Before closing the junction box, double-check all your connections for accuracy. Once you’re confident everything is correctly wired, turn the power back on at the main circuit breaker.
Step 6: Programming the Timer
Refer to the Diall Digital Immersion Timer’s user manual to program your desired heating schedule. You can set specific times for your immersion heater to turn on and off, optimizing energy efficiency.
Conclusion
By following these detailed wiring instructions, you can confidently install your Diall Digital Immersion Timer and enjoy the benefits of energy-efficient hot water. Remember always to prioritize safety, turn off the power when working with electrical systems, and consult a professional electrician if you have any doubts or concerns. Enjoy the convenience and cost savings that come with an intelligently timed immersion heater!
Important: Ensure that the power to the immersion heater circuit is turned off at the main electrical distribution board before attempting any wiring.
- Identify Components: Familiarize yourself with the Diall digital immersion timer and its components. You should have the timer unit, a wiring diagram, and the necessary mounting hardware.
- Location: Choose a suitable location for mounting the timer. It should be close to the immersion heater and easily accessible.
- Prepare Wiring: Gather the required electrical cables and wires. You’ll typically need a live (brown), neutral (blue), and earth (green/yellow) wire, as well as the two cables that go to the immersion heater.
- Mounting: Securely mount the timer unit on the wall using the provided hardware. Ensure it is level and at a suitable height for easy operation.
- Wiring Connections:
- Connect the live (brown) wire from your electrical supply to the “L” terminal on the timer.
- Connect the neutral (blue) wire from your electrical supply to the “N” terminal on the timer.
- Connect the earth (green/yellow) wire from your electrical supply to the “E” or “Earth” terminal on the timer.
- Heater Connections:
- Connect one cable from the immersion heater to the “Load” or “Heater” terminal on the timer.
- Connect the other cable from the immersion heater to the “Neutral” or “N” terminal on the timer.
- Setting the Timer: Refer to the user manual for your Diall timer to set the desired heating schedule. Typically, this involves setting the on and off times for the immersion heater.
- Testing: After completing the wiring and timer setup, turn on the power at the main distribution board. Test the timer by verifying that the immersion heater turns on and off according to your programmed schedule.
- Safety Check: Double-check all connections to ensure they are secure and there are no exposed wires. If everything is in order, close the timer cover and ensure it is sealed properly.
- Final Inspection: Perform a final visual inspection of your installation to ensure everything is tidy, secure, and in compliance with electrical safety regulations.
Remember that working with electrical wiring can be dangerous, so if you are not comfortable or experienced with electrical work, it is recommended to hire a qualified electrician to install the timer for you. Always prioritize safety when working with electricity.
2. Safety Precautions
Before we dive into the installation process, safety should be your top priority. Always switch off the power to the immersion heater
In the fast-paced world of today, managing your household appliances efficiently is crucial. Enter the POWER digital weekly immersion timer – your key to hassle-free operation and effective time control. In this article, we’ll guide you through the installation and operation of this exceptional device.
Step 1: Setting the Day
Press the “Day” button until your desired day or option appears on the display. Whether you need it for a daily routine or specific occasions, this timer offers the flexibility you need.
Confident Wiring
Understanding the wiring of your timer is essential for safe installation. Our clear and concise instructions will resolve any confusion, ensuring a seamless setup.
Modern Immersion Heating
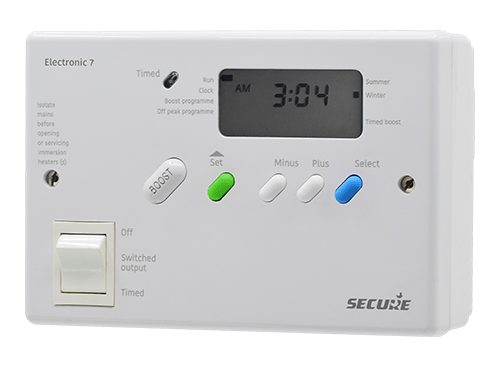
In the past, immersion heaters often had tangled wires and complicated diagrams. With the Timeguard-NTT08 Electronic Timer, you can say goodbye to the confusion. It comes equipped with a rechargeable battery back-up and cord grip for secure cable installation.

A Week’s Worth of Control
The IHTGPW seven-day timer simplifies your life. The weekdays are printed around the timer, making it effortless to program. Say farewell to manual adjustments every day!
Diall Day Electronic Timer – Your All-in-One Solution
Visit B&Q for all your home and garden supplies, including the Diall Day Electronic Timer. It offers versatile programming options to suit your lifestyle.
Masterplug Digital Immersion Heater Timer
Enjoy the convenience of the Masterplug digital immersion heater and lighting timer. It comes with a power indicator, ensuring you always know its status.
User-Friendly Design
Our time switch is designed with simplicity in mind. Its user-friendly interface ensures effortless operation, making it perfect for wall mounting.
Safety First
Safety is paramount when dealing with electrical appliances. Always connect the installation wiring to the designated terminals, and never install or use the machine near water sources.
Initial Setup
Plug in the timer for approximately 10 minutes to charge the rechargeable battery fully. This ensures uninterrupted performance.
Comprehensive Instructions
Before installing, operating, or servicing the equipment, take the time to read and understand the instructions thoroughly. This timer is suitable for domestic immersion heaters and offers unparalleled convenience.
Find Your Timer Manual
Locating the instructions for setting your digital timer is crucial for optimal performance. Refer to the instruction manual for a step-by-step guide.
Conclusion
Incorporating the POWER digital weekly immersion timer into your home not only enhances your appliance management but also adds a layer of convenience to your daily routine. With straightforward installation and user-friendly operation, you’ll wonder how you ever managed without it. Say goodbye to tangled wires and confusion – embrace the future of appliance control with the POWER digital weekly immersion timer.